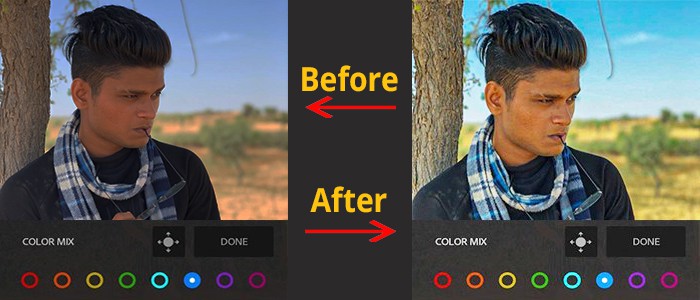
If you are a photographer then adobe Lightroom is the best software to edit your photos. With the help of this software, you can do unlimited things. But if you are a beginner and have no idea how to edit in Lightroom. In this article, we will explain the basic setting and steps for editing your photos. Photo editing is not difficult at all and after using Lightroom you will definitely get in love with this software. Photo editing is a part of post-production and its most fun and enjoyable part to do.
Before Editing you should know all these things!
- Is there any detail missing in highlight or shadows.
- Colors must look natural
- Skin tones must look natural
- Subject of the photo must be in focus and clean.
Basic Setting you must know While Editing Photos in Lightroom
1. Tone
The tone is one of the most important editing tools in Lightroom. It helps to increase the quality of the image. But what means tone editing in photography? It’s a range of lightest to the darkest in an image called a Tonal image.
We mainly focus on adjusting the tonal values in the photo. Due to big lighting photos can cause highlights to be bright and shadows get dark and it starts losing information? In Lightroom, tone adjustments are the most powerful editing tool because we can separately adjust the highlights and shadows. It also gives us the freedom to work on one area without disturbing another part.
2. Tone Curve
The tone curve is one of the most powerful tools but it’s not easy to use in the lightroom. But if you know how to work with curves then it’s easy for you because it works almost in a similar way. If you want to make the image darker or brighter then we create a line on it and move it up and down to adjust the brightness and darkness.
The bottom left corner point on the line will affect the shadows. The top right corner point on the line will affect the highlights. We use a tone curve to adjust the lighting. We can also select a particular channel and do colour tone in the image by adding colours from shadows, mid-tones, highlights.
3. HSL Panel
HSL/Color is an editing tool that allows us to work on a specific colour in an image. We can also change the hue of a selected colour. If you want grass red and vivid then adjust the luminance of a colour range. If you want to change the brightness of the subject skin tone then adjust the luminance value.
4. Sharpening
While photo-editing we must refine the edge in the image to give it a final look. In Adobe lightroom sharpening tools are outstanding. In lightroom, we get a better sharpening effect as compared to Photoshop. Also sharpening tools work better with the noise reduction tools. But you must sharpen photos after making your local adjustments.
5. Presence
In lightroom presence tool is used to make textures and colours more clearly. Saturation and vibrance are the most useful tools in the present panel. Both of them help to control the colours appearing in the photo. If you want to increase the contrast of the image then use clarity sliders in the presence panel. It’s an amazing tool must try while editing your photos.
6. Reduce Noise
It’s very difficult to manage the digital noise. Noise affects the quality of the final image. Noise occurs due to the increased ISO values. In post-production, we can reduce the noise of the image easily in Lightroom. When we capture at ISO 10,000 heavy noise comes into the image. But we can reduce noise and clean up the image in Lightroom.

